Codex Pelagia - Lightsaber Prototype
Hey everyone !
Tony here, back after some time with some fresh, new, exciting stuff. I have been working on a personal side project around Star Wars. Here's the first look at what happened during these last couple months !
So, as a little side note, this is the main prop of a story I am writing called "Codex Pelagia". Expect to learn more about it very soon !
On the more technical side, this work was done in Maya, Substance Painter and Ultimaker Cura. Printing done with an Ender-5 printer. Design fully mine although, of course, Lightsabers are a Star Wars thing and all rights for this go to the appropriate owners.
Please feel free to give your opinion on this quite amazing piece, as I'm still in the learning process of the whole printing thing.
Cheers to you all, enjoy your 2023. I know I will !

001 - This is the first sketch I made of this weapon. It was meant to elaborate the general proportions of it. I immediately wanted to have that narrow "neck" on it, as Obi-Wan's lightsaber greatly inspired me in the first phases of this project.

002 - This is a more "geometric" look at the design, after a couple itterations. I was getting ready to hop in Maya and recreate it in 3D so I drew these as rough guidelines. Notice how the pommel changed to be more "round".

003 - This is the complete model done in Maya. Again, a couple of major tweaks had to happen. The emitter was far too small for the rest of the body, I added a couple curves at the base of the neck and the pommel. Inspired by Eno Cordova's lightsaber.

004 - Here's a more "in situation" look at the piece. I'm really happy with the curves and proportions !

005 - This is a look at an early textured version of the saber. I went for a full "copper" look to try and differ from the classic durasteel materials from the movies. Turned out to be a little too aggressive on the eye !

006 - More advanced texturing. I went back to some polished steel and added a faint blue tint to it, as a mean to contrast with the copper accents remaining.
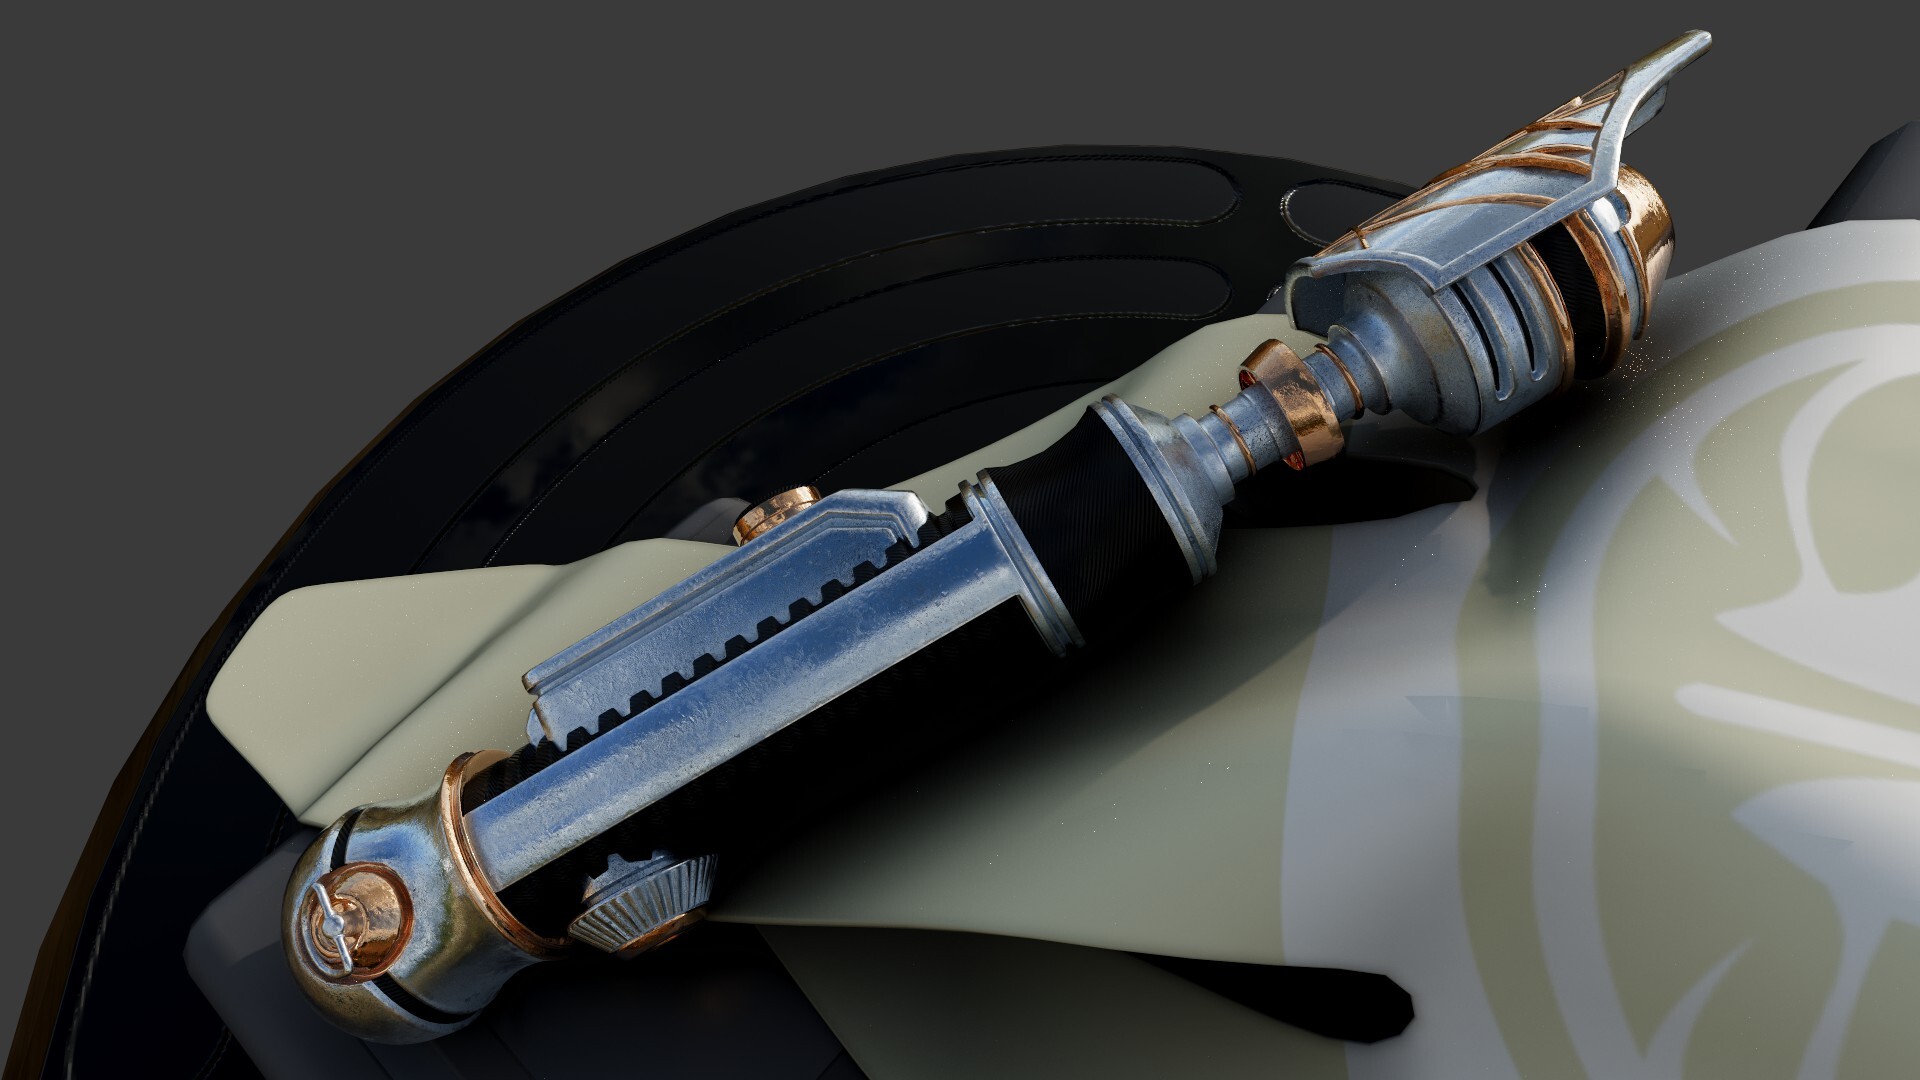
007 - Definitely more elegant design. The pommel really ressembles a medieval one and I'm all here for it !

008 - First piece of the saber printed. The pommel really feels like the star of the show, in a way. Next couple pictures I took for Instagram, as a mean to keep track of the evolution of the print !

009 - Here's the main part of the grip. More than 7 hours of printing for this one and a little issue at the end just before the neck. Still, impressive result !
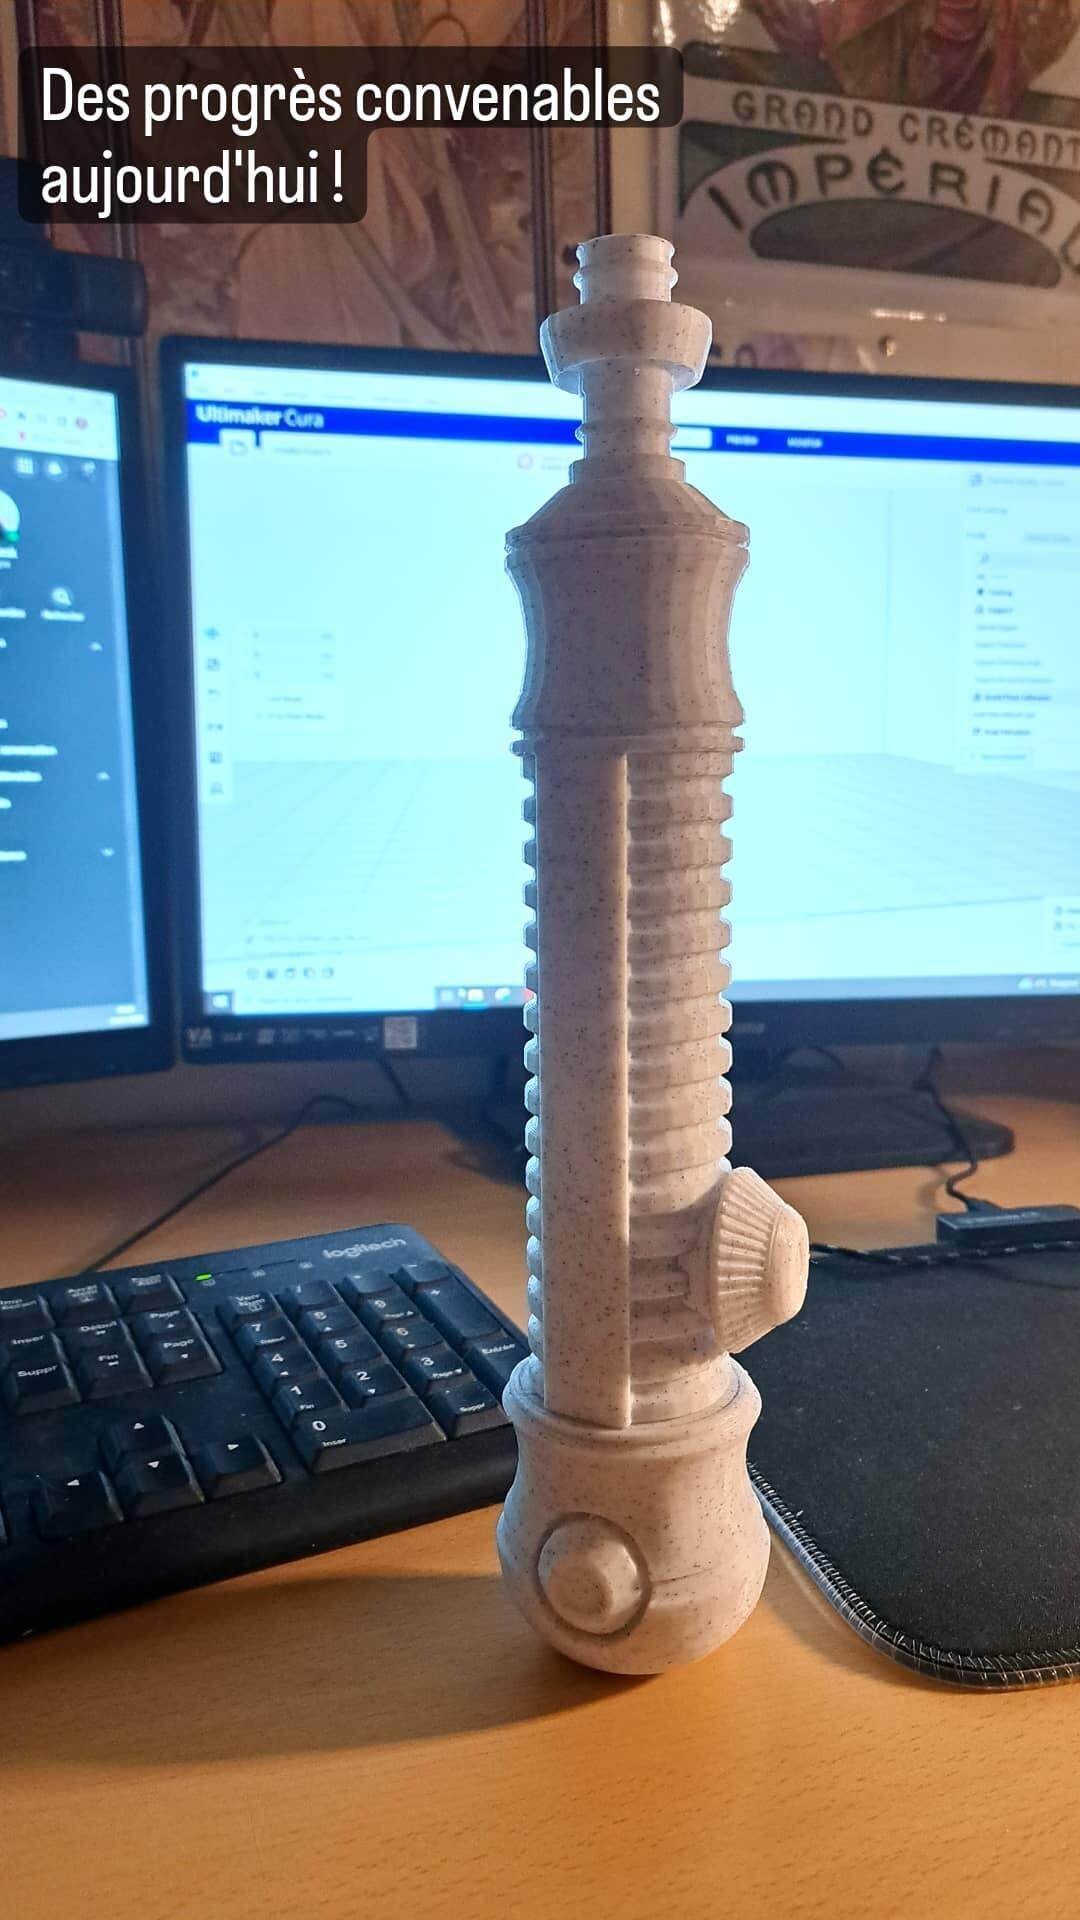
010 - Here's the full body with the neck and an extra button near on the grip. This was designed to be the blade length regulator, important detail for a Jedi since most of them grow quite a lot during their Padawan years and the blade has to adapt !

011 - Printing almost fully done here. I obviously had a bit of a scalling issue but as a first try with 3D printers I'm not too disappointed by the result. Ergonomy wise, I'm pretty happy with how the saber handles.

012 - And finally, the whole thing ! After about 40 hours of printing, trials and errors not included, I now have a 1:1 replica of my very own lightsaber design. I will by polishing this and painting it soon, so expect to see this beauty again !